Manual Mode
This section describes the manual mode of the robot control. The robot can be controlled using the smartPAD (Teach Pendant). To run the manual mode, do the following steps:
Choose the frame
World/Tool/Jointby pressing the corresponding button on the smartPAD.Move the
joints/in Axes Directionof the robot by pressing the corresponding buttons on the smartPAD.Change the speed of the robot by pressing the [Speed] button on the smartPAD. [Optional]
Press the
Playbutton on the smartPAD to start the robot.Press the
DeadManbutton on the smartPAD to stop the robot. [it’s gray, located on the back of the teach pendant]While holding the dead-man switch halfway through, press the
+and–buttons located on the right side of the teach pendant.
See Fig. 17 for more details.
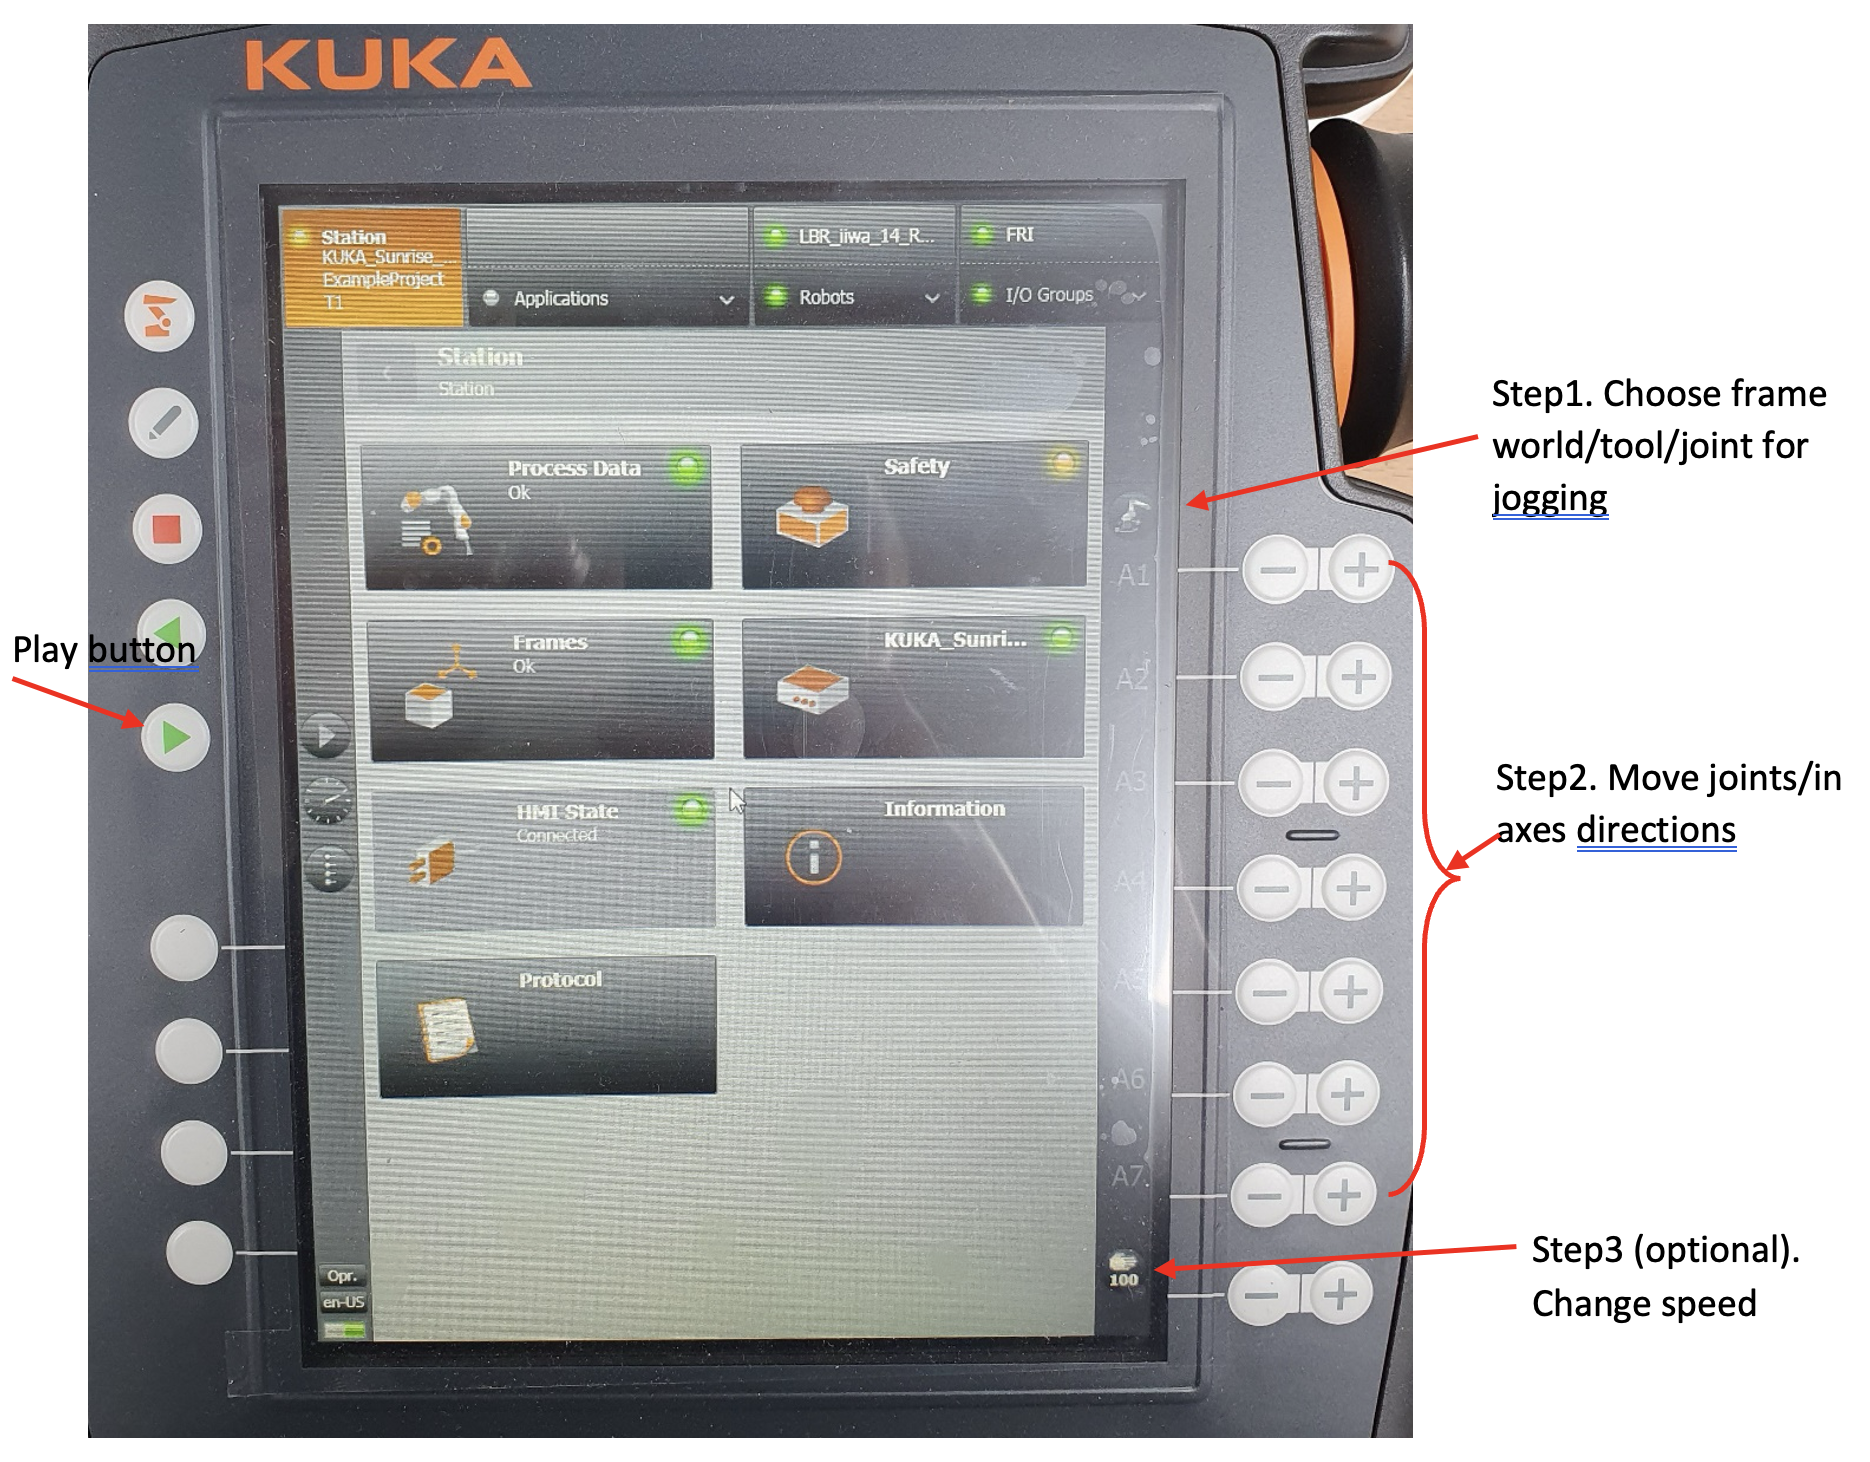
Fig. 17 KUKA LBR iiwa SmartPAD Control
Todo
Add the image of the smartPAD with the buttons labeled.
Todo
Add the image of the smartPAD with the DeadMan button labeled.
Todo
Add the Video of the manual mode control.
Application of Manual Mode
To run an already available (pre-programmed) application select the application from the menu, see Fig. 18. then whilst holding the engagement switch (DeadMans switch) press and hold the play button on the left hand side
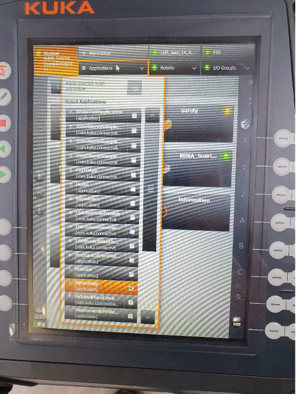
Fig. 18 KUKA LBR iiwa Application Menu
The following example demonstrates how to control the robot in manual mode.
Note
Some of these applications are documented on the KUKA LBR iiwa 14 R820 page, in documentation link.
Example 1: Home Position
The robot moves to the home position. The home position is the initial position of the robot. The robot moves to the home position by selecting the home position from the below path:
Applications -> Home Position
By pressing the play button and holding DeadMan button on the smartPAD, the robot moves to the home position which is 90 degrees arm. See below video for more details.
Todo
Add the video of the robot moving to the home position.
Example 2: Impedance Control
The robot moves to the impedance control position. The impedance control position is the position where the robot moves with the force applied to the robot. The robot moves to the impedance control position by selecting the impedance control position from the below path:
Applications -> Impedance Control
By pressing the play button, a pop-up window appears on the teaching pendant informing
This app is intended for floor: just press OK.
Next, a new window appears Press of to finish the app: Do not press OK .
Instead of pressing OK, just interact with the robotic arm by pushing/pulling it;
the robot will keep/hold the homing position in spite of external disturbance.
Todo
Add the video of the robot moving to the impedance control position.
Example 3: Zero Position
The robot moves to the zero position. The zero position is the position where the robot places the robot arm
in a straight-up position corresponding to zero values on all axes.
Applications -> Mechanical Zero Position
See the joints values on:
Pad > Robots > Joint Position
Todo
Add the video of the robot moving to the zero position.
Example 4: Motions
the robot executes some pre-defined motion including the redundancy (resembles drawing the infinite sign on a whiteboard).
Applications -> Motions
Todo
Add the video of the robot executing the motions.
Example 5: SmartServoLINInteractionControl
end effector executes up-down motion (a sine-wave) while still allowing interaction/physical-contact with user.
Applications -> SmartServoLINInteractionControl
Todo
Add the video of the robot executing the SmartServoLINInteractionControl.