Starting Up
Please follow this instruction when powering on the AgileX Scout Mini. This instruction is important to ensure the AgileX Scout Mini boots up correctly.
Safety Precautions
Before powering on the AgileX Scout Mini,
Note
Make sure the power supply is disconnected from the AgileX Scout Mini.
Note
Make sure the AgileX Scout Mini is is fully charged.
Unpacking and Battery Installation
When you receive the AgileX Scout Mini, unpack the robot and install the battery. For mode details you can watch the video below.
Powering On the Robot
To power on the AgileX Scout Mini press the power button which is located at the rear of the robot. Look at the picture Powering On . When the robot is powered on, the battery indicator LED will light up and the voltage level will be displayed on the LED.
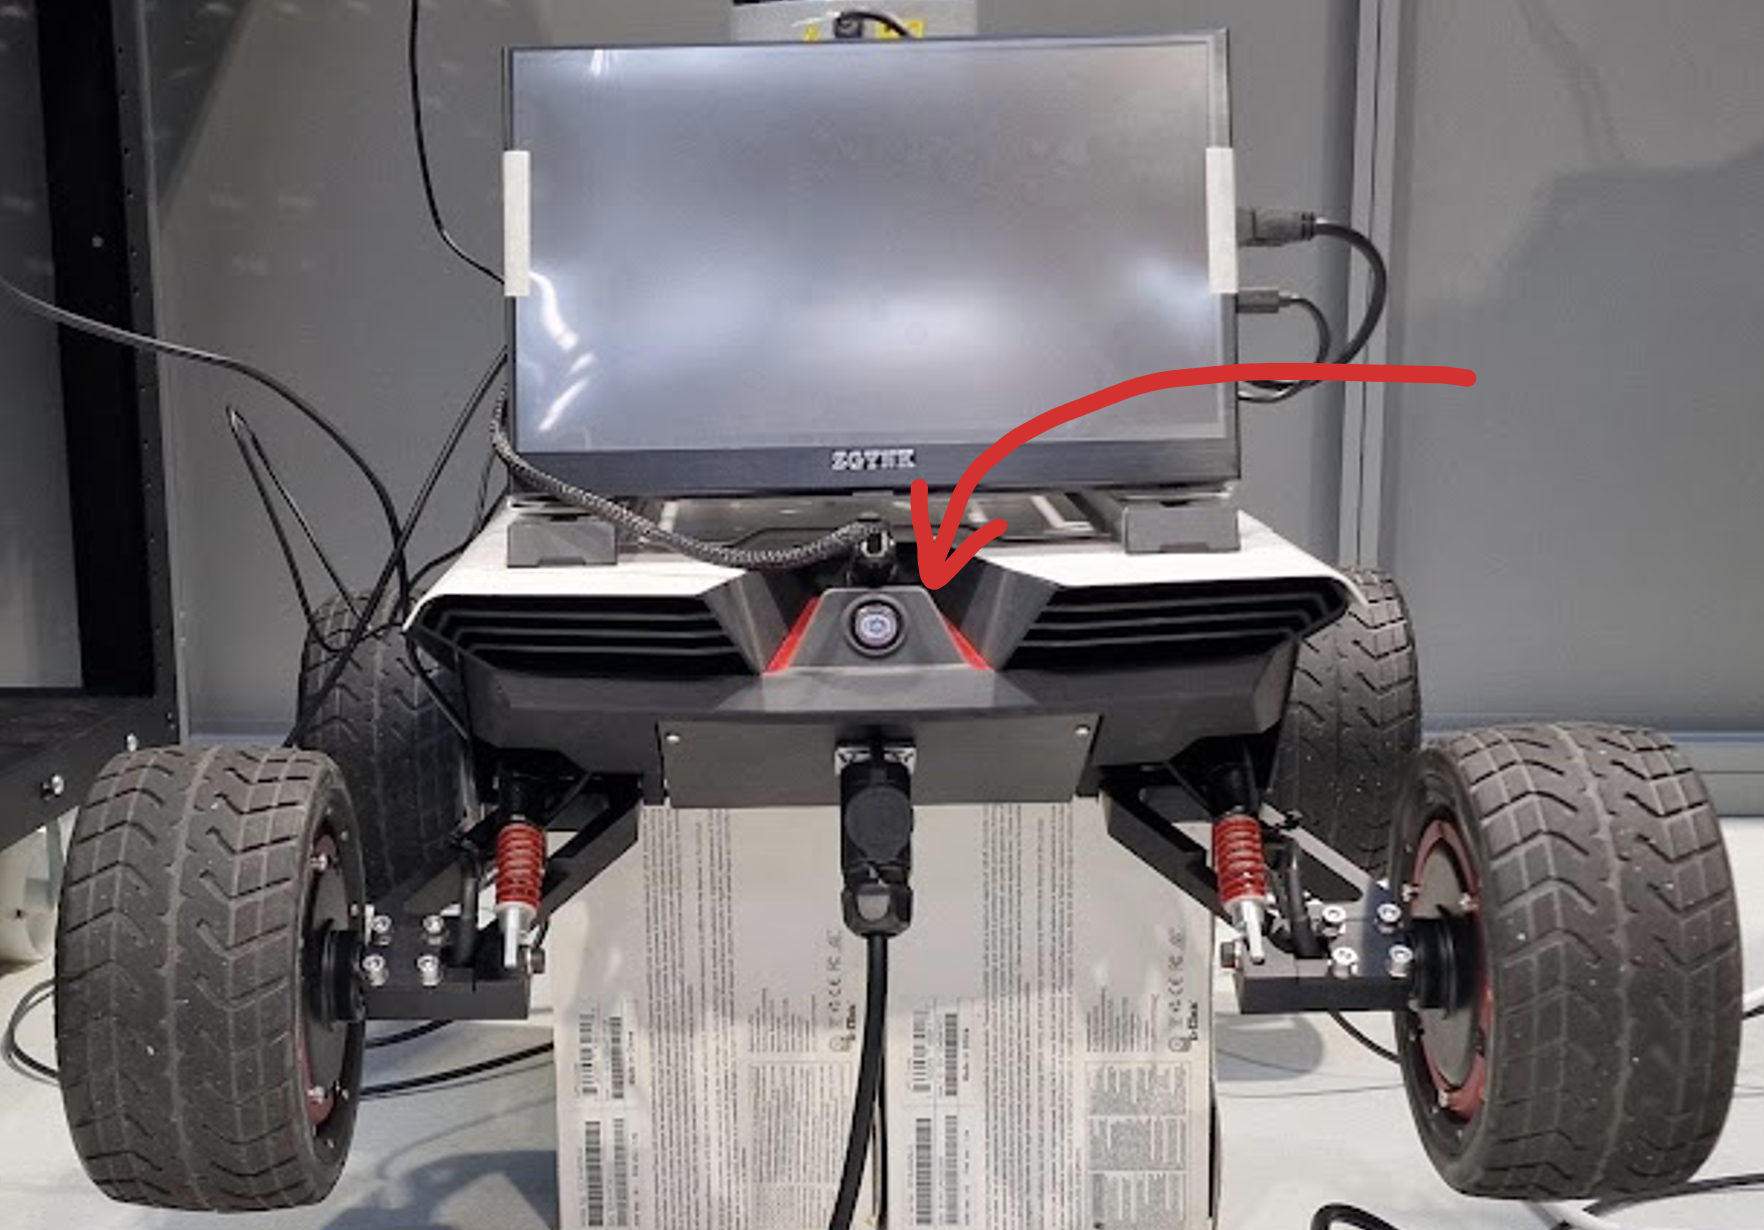
Fig. 56 Powering On
Powering On the Remote Controller
Before powering on the remote controller, make sure the remote controller is fully charged. Also, make sure that all four toggle switches are in the up position. Look at the picture Remote Controller.
To power on the remote controller, press the both power buttons on the remote controller at the same time.
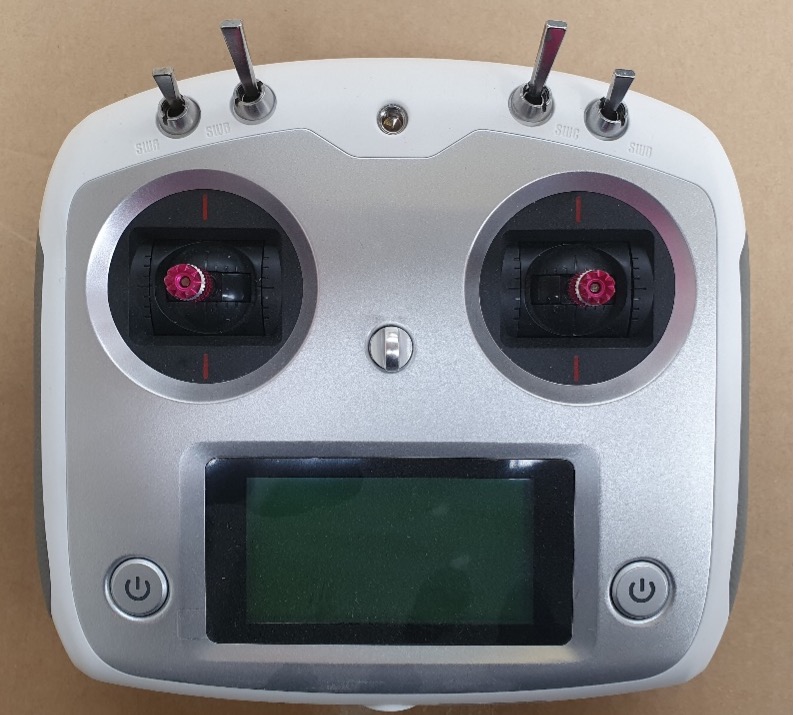
Fig. 57 Remote Controller
Now the AgileX Scout Mini is ready to be used. To control the robot, refer to the Manual Control section.