Starting Up
The goal of this document is to provide a step-by-step guide to starting up the Qualisys Under Water system and recognize a Rigid Body, and stream the data into ROS.
To start up the Qualisys system, follow these steps:
Turn on the Qualisys computer.
Open the Qualisys Track Manager software. See the Fig. 169.
Fig. 169 Qualisys Logo
Click on
New projectbutton shows in the Fig. 170.

Fig. 170 New Project
Give the project a name, e.g. Qualisys_Stefan_test1, then select Settings imported from another project, click
OK. See the Fig. 171.
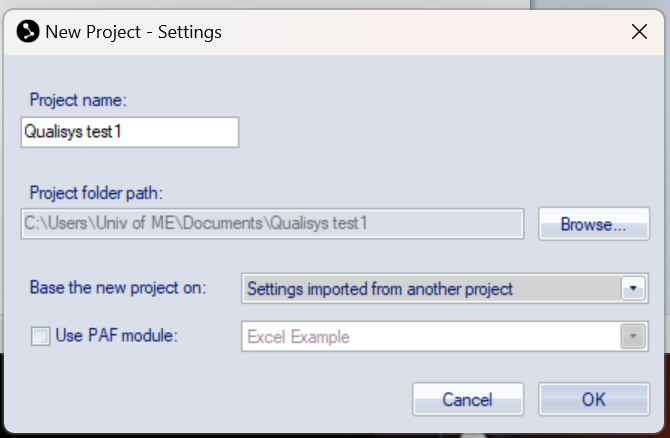
Fig. 171 New Project
Select
Settingsfile at a location where the system worked before. Documents -> 20240308_StefanAndThomas_training and hitOK.Click on the
Newicon to start the system. See the Fig. 172. Make sure all 6 tracker cameras are operational. See the Fig. 173.
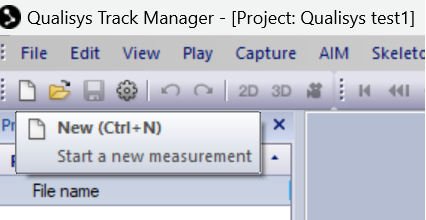
Fig. 172 New

Fig. 173 Operation
Troubleshooting
If cameras do not show up in the Qualisys Track Manager, try the following:
Try turning off the power to all cameras (there is just one large power adapter poering them all), then wait for a couple of seconds, and then turn back on.
Check the networking settings. right-click on the `Qualisys DHCP Server icon -> Configuration wizard`.
See the Fig. 174.
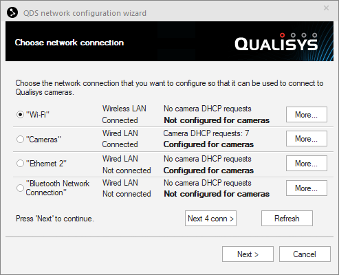
Fig. 174 DHCP
3. The IP for the Ethernet 2 port should be 192.168.0.1, and for the Cameras port the IP should be 192.168.2.1.
In case that is not the case and you need to change/amend them, first select the port then click Next and follow the instructions.
Note
Another Qualisys computer, namely Qualisys Air, has its Ethernet port IP set to 192.168.0.2, so a different IP.
Check the wiring is done according to the Wiring Scheme diagram.
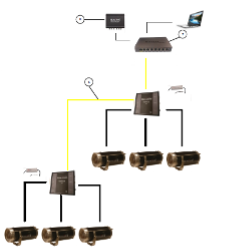
Fig. 175 Wiring Scheme
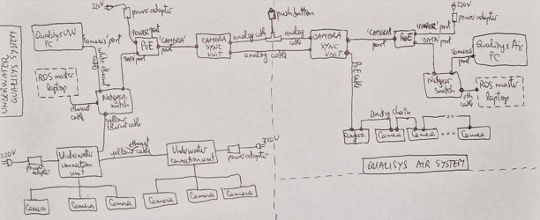
Fig. 176 Wiring Diagram