AgileX Tracer Starting Up
Please follow this instruction when powering on the AgileX Tracer. This instruction is important to ensure the AgileX Tracer boots up correctly.
Safety Precautions
Before powering on the AgileX Tracer,
Warning
Read the AgileX Tracer user Documentation.
Note
Make sure the power supply is disconnected from the AgileX Scout Mini.
Note
Make sure the AgileX Scout Mini is is fully charged.
Note
Make sure Bunker does not have any obvious defects.
Powering On the Robot
First of all find the place where the power switch is located. The power switch is located on the back of the robot. See Fig. 73.
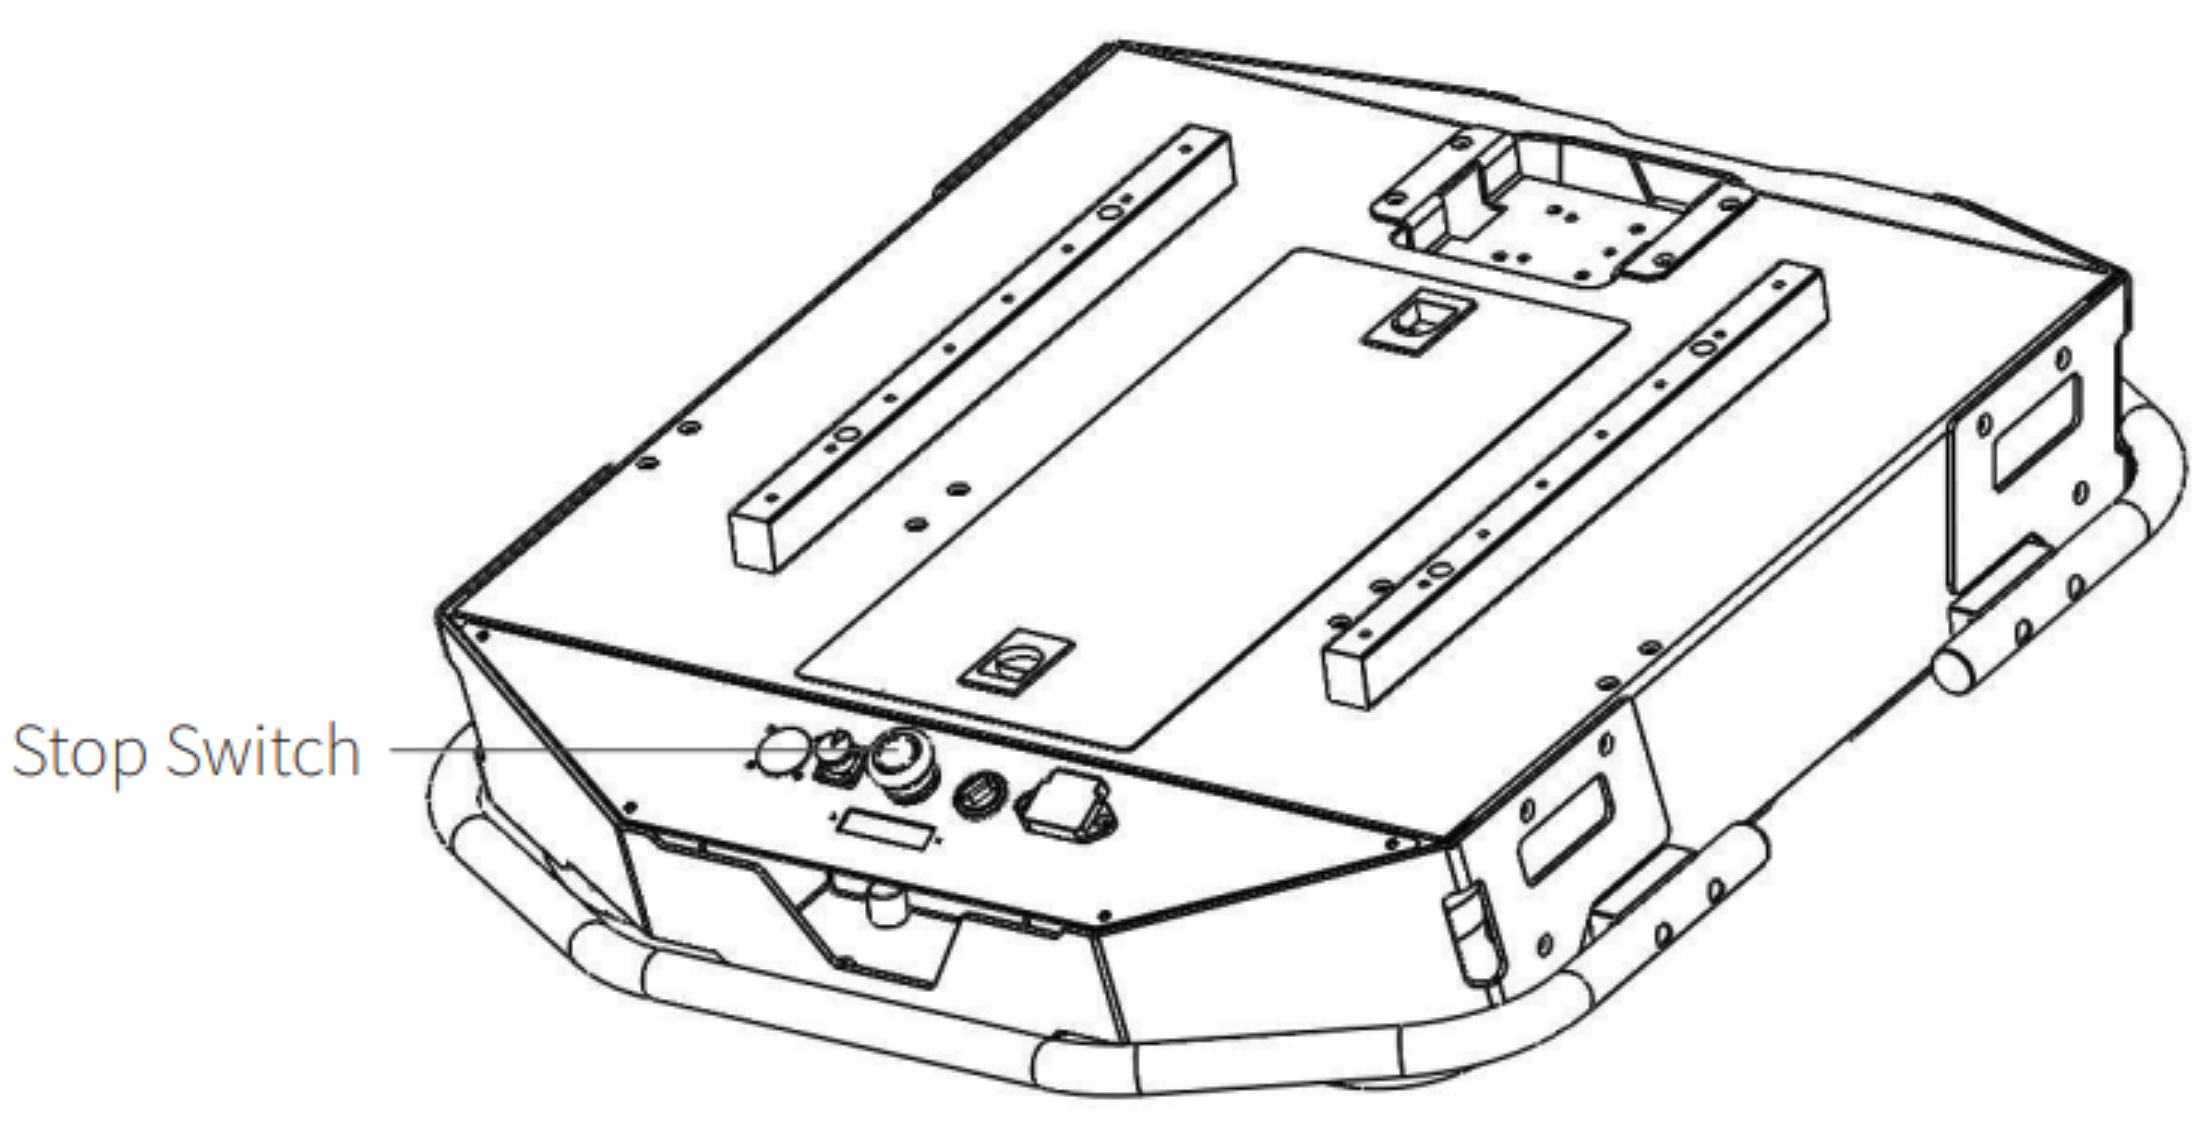
Fig. 73 Rear Panel
The control panel has the following components, See Fig. 74:
Q1: D89 serial port
Q2: Stop Switch
Q3: Power Charging Port
Q4: Extension Interface
Q5: Electricity Meter
Q6: Rotary Switch [Main Electrical Switch]
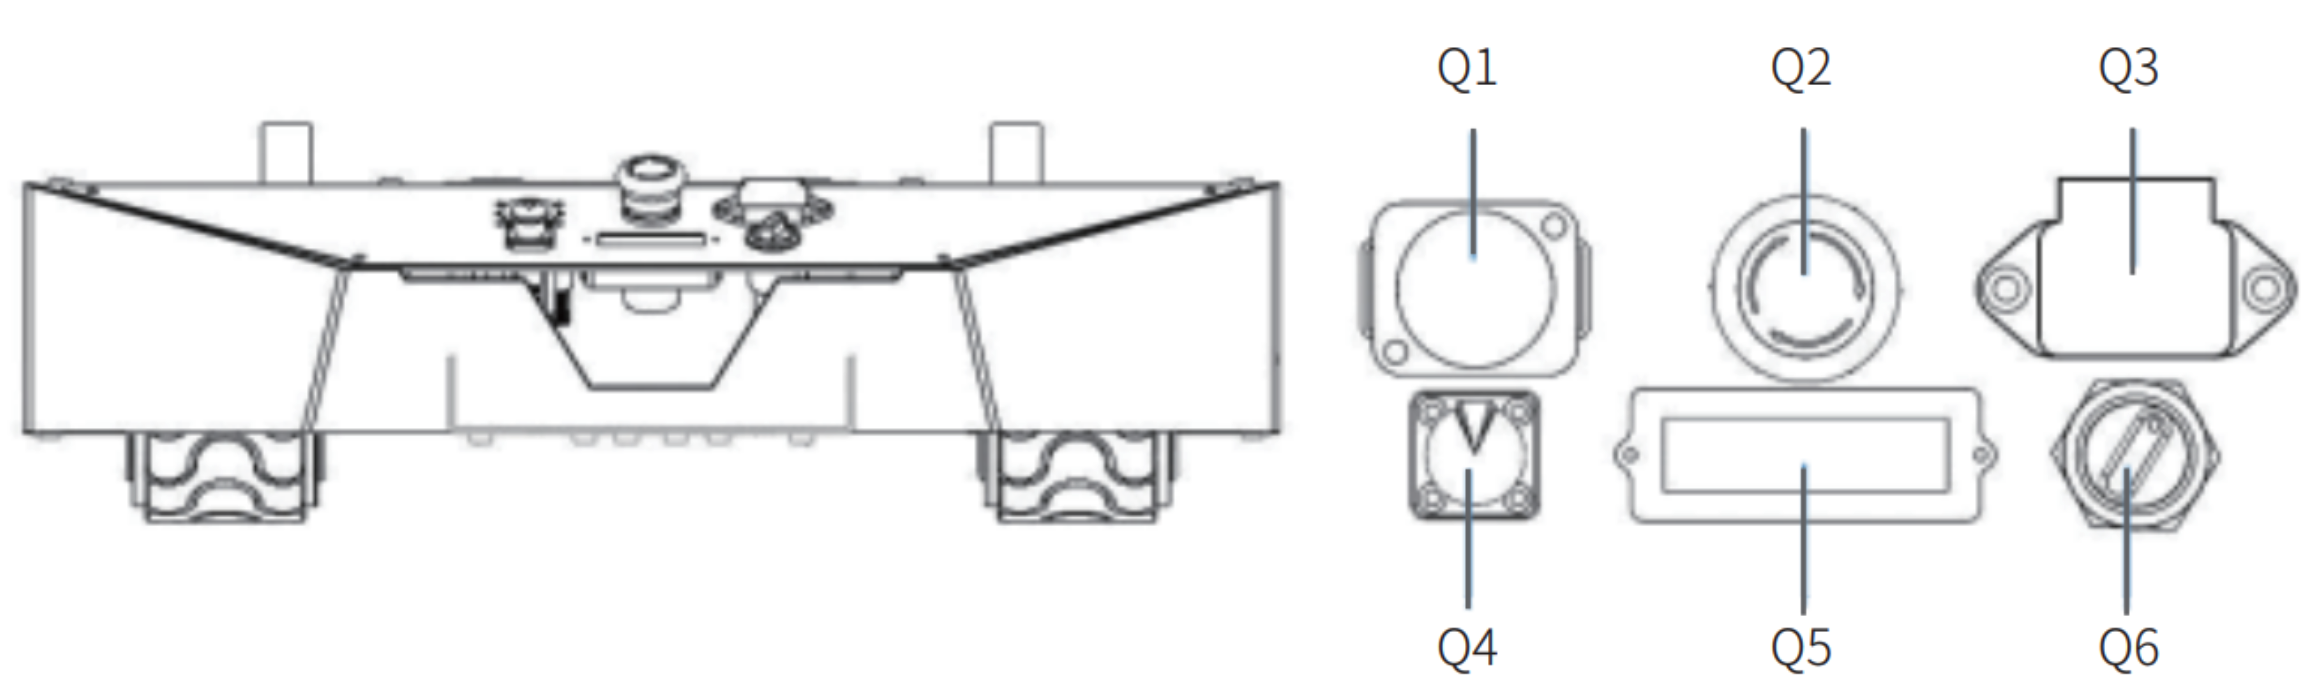
Fig. 74 Control Panel
Note
Before powering on the robot, make sure the emergency stop buttons are all released.
Now, rotate the key switch Q6 on the electrical panel, and normally, the voltmeter will display correct battery voltage
and front and rear lights will be both switched on.
Shutting Down the Robot
To shut down the robot, rotate the key switch Q6 on the electrical panel to the OFF position.
Powering On the Remote Controller
Before powering on the remote controller, make sure the remote controller is fully charged. Also, make sure that all four toggle switches are in the up position. Look at the picture Fig. 75.
To power on the remote controller, press the both power buttons on the remote controller at the same time.
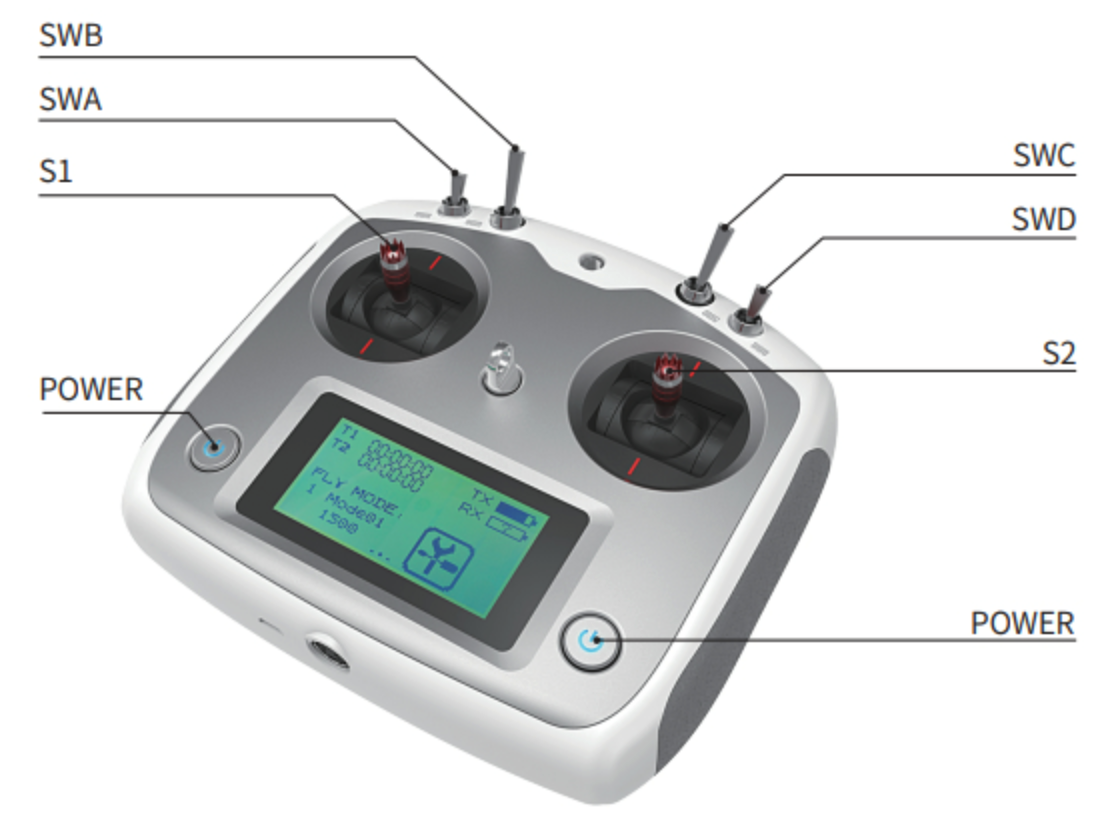
Fig. 75 Remote Controller
Now the AgileX Tracer is ready to be used.