H1 Start Up
For starting up the H1, first of all we need to prepare the robot into the proper position and then turn on the power.
Video below shows the H1 start up process.
Boot process
To prepare the robot for startup, follow these steps:
Place H1 on the ground and secure it with a rope tied in a dead knot at H1’s shoulder latch. See Fig. 43.
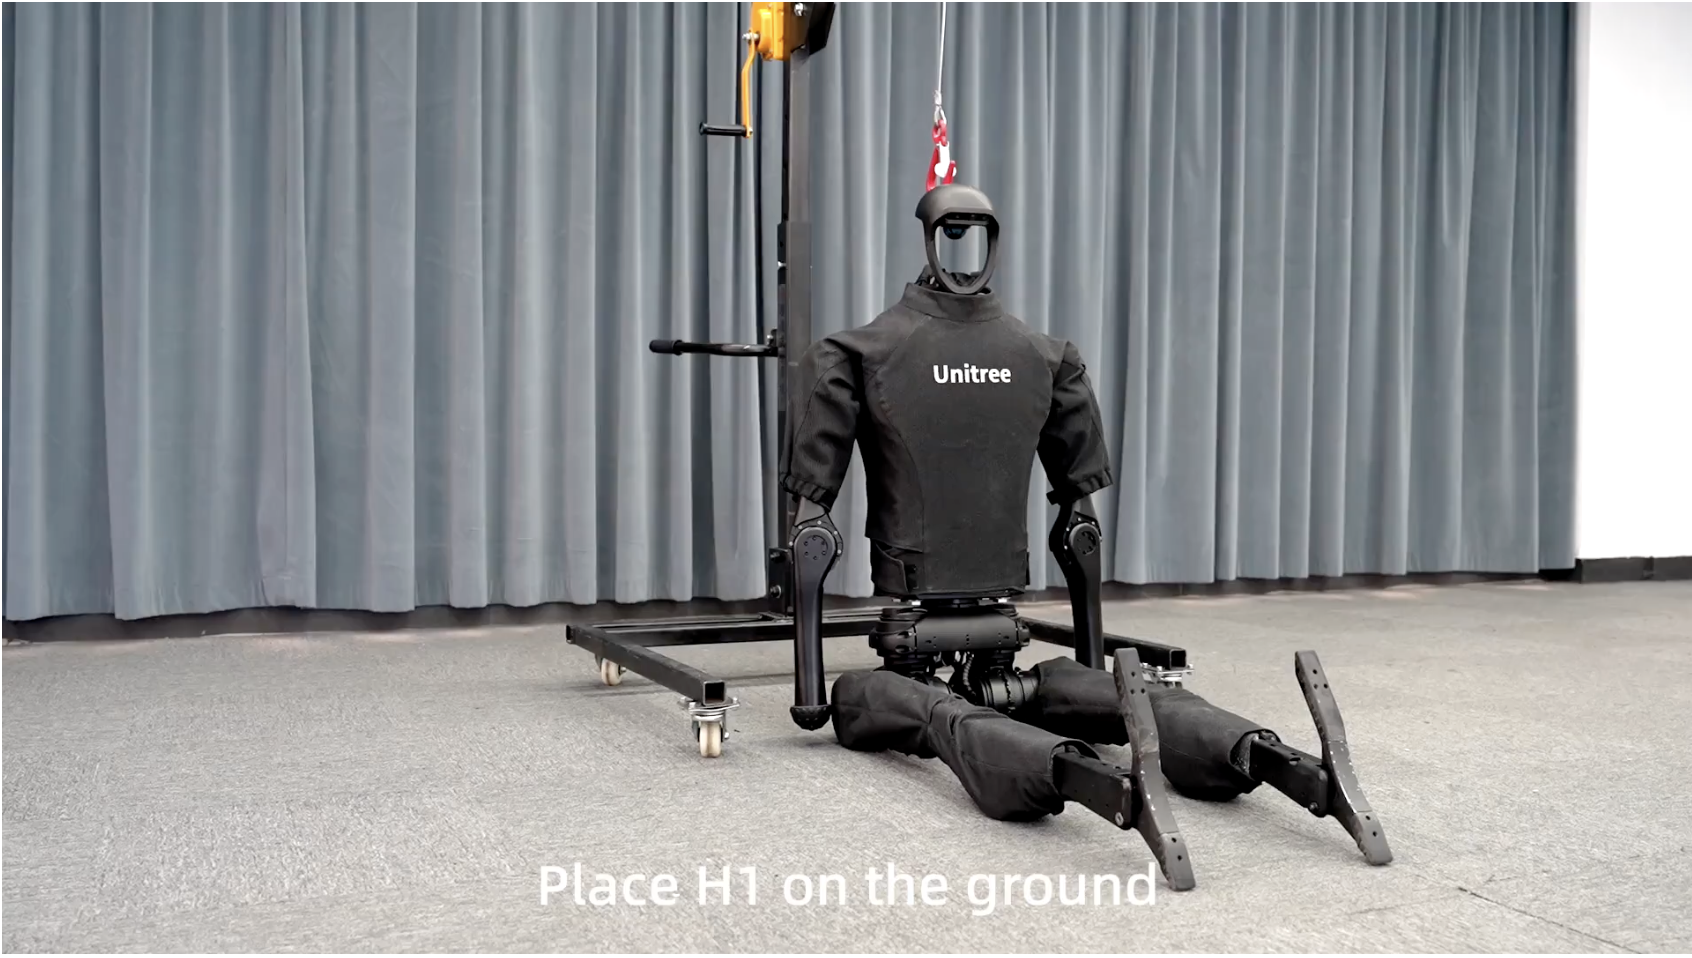
Fig. 43 Unitree H1 sitting
Hang the rope on the clasp of the protective frame to support H1. See Fig. 44.
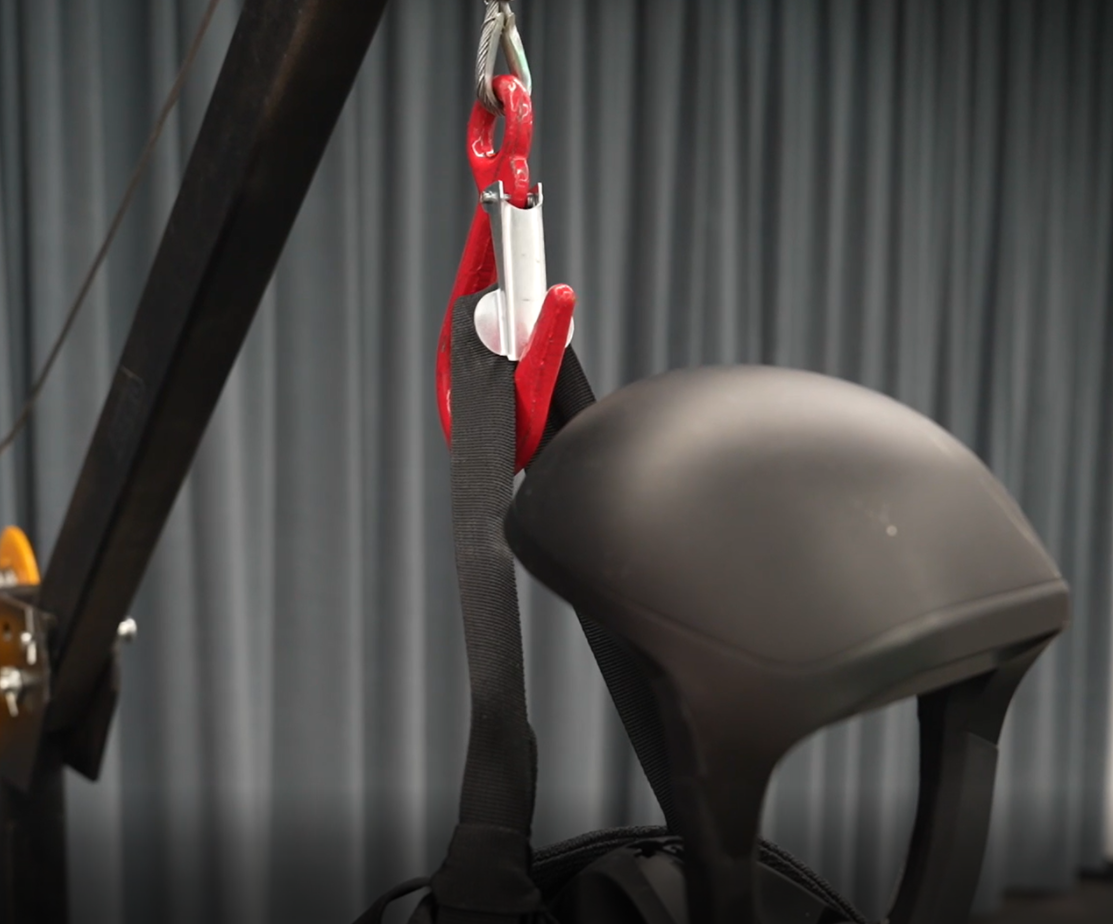
Fig. 44 Unitree H1 hanging
Raise H1 along with the protective frame to prepare for startup. See Fig. 45.
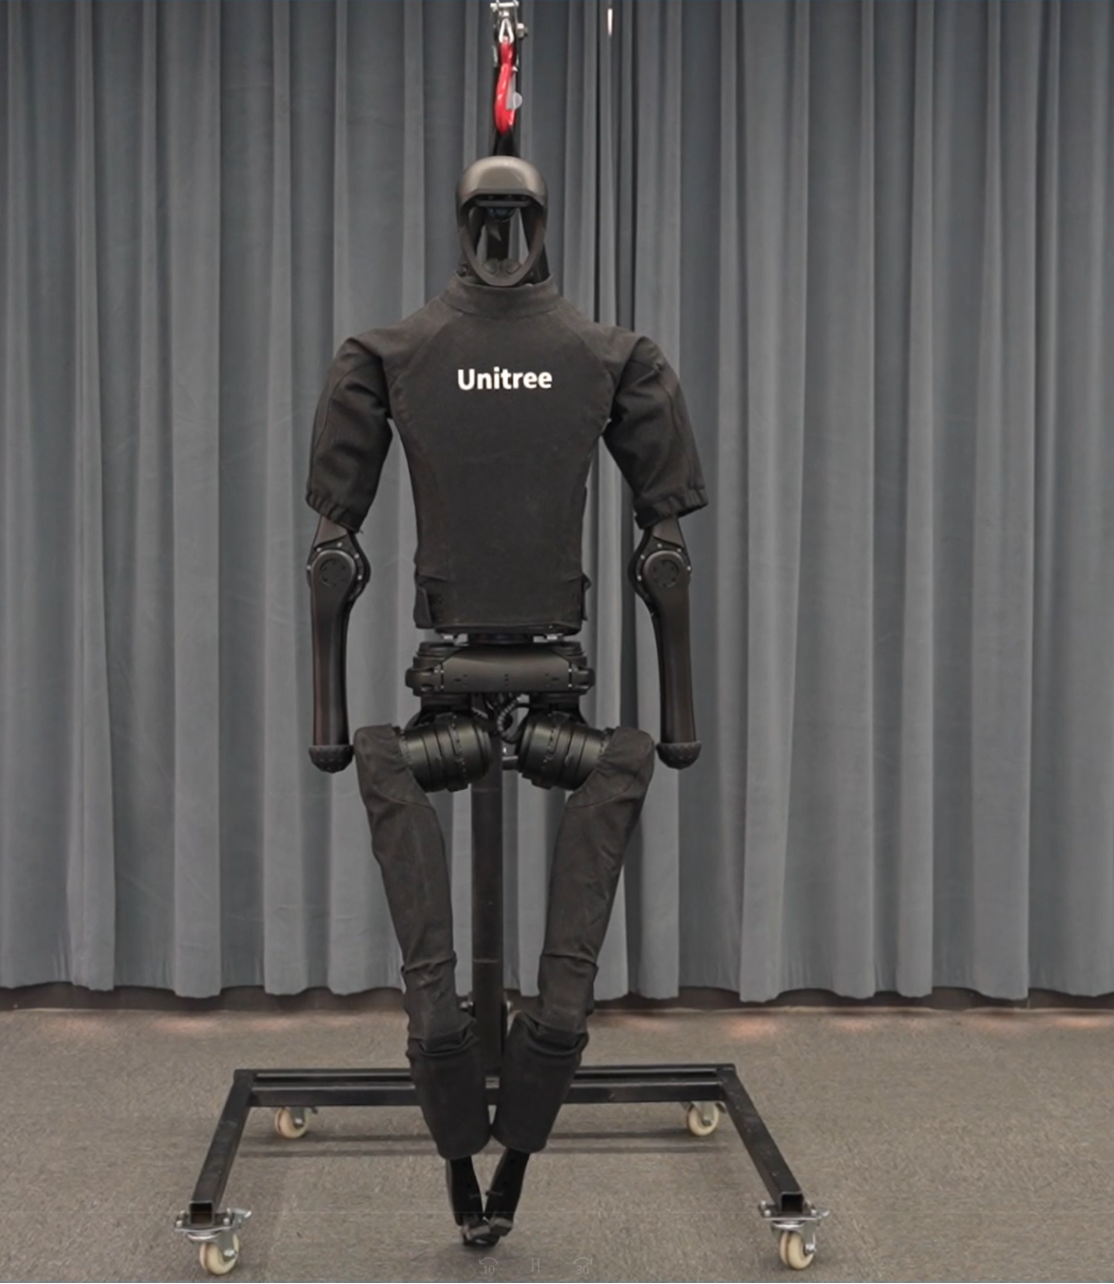
Fig. 45 Unitree H1 raising
Insert two batteries into the battery compartment with the key-forward orientation. See Fig. 46.
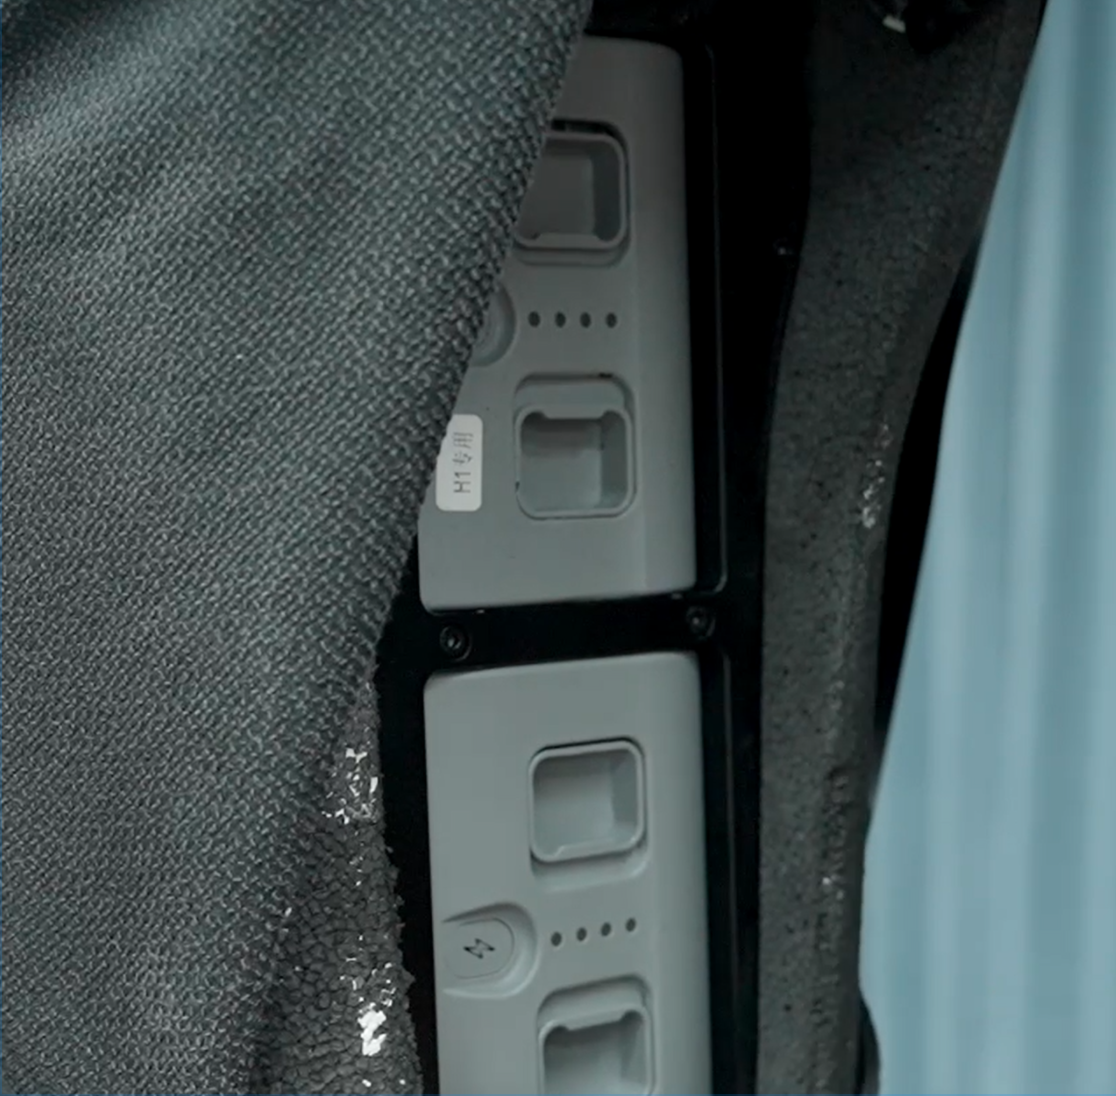
Fig. 46 Unitree H1 battery insertion
Turn the arm inward until it reaches its limit and then lower it vertically. See Fig. 47.

Fig. 47 Unitree H1 arm position
Ensure that the feet are cocked up to their limit. See Fig. 48.
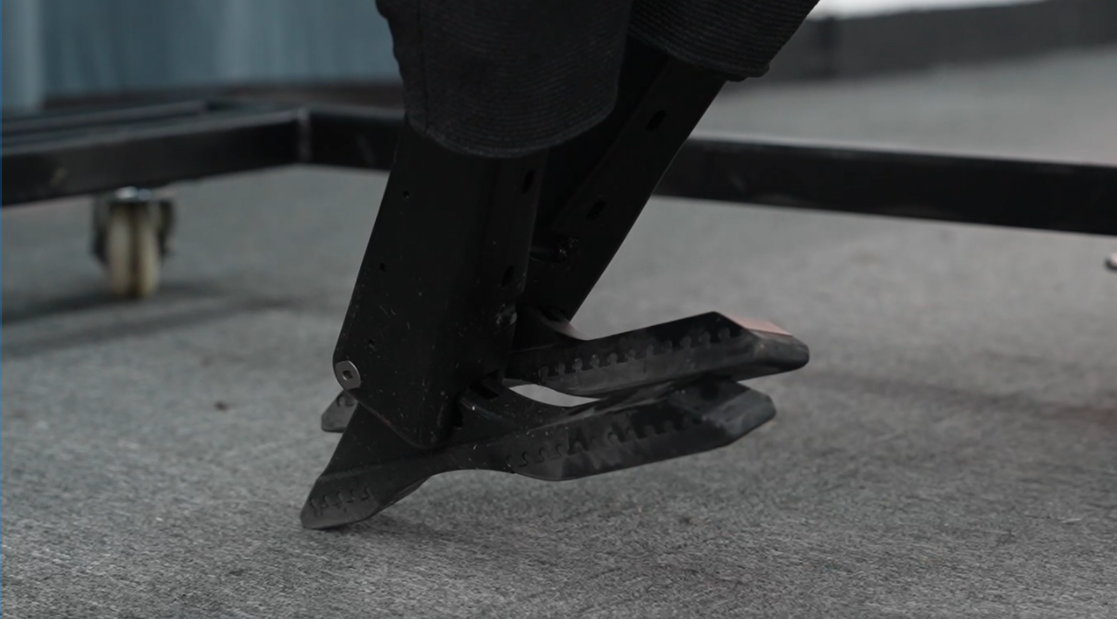
Fig. 48 Unitree H1 foot position
Maintain the position as depicted in the Fig. 45.
Short press and long press both batteries simultaneously to power them up. See Fig. 49.
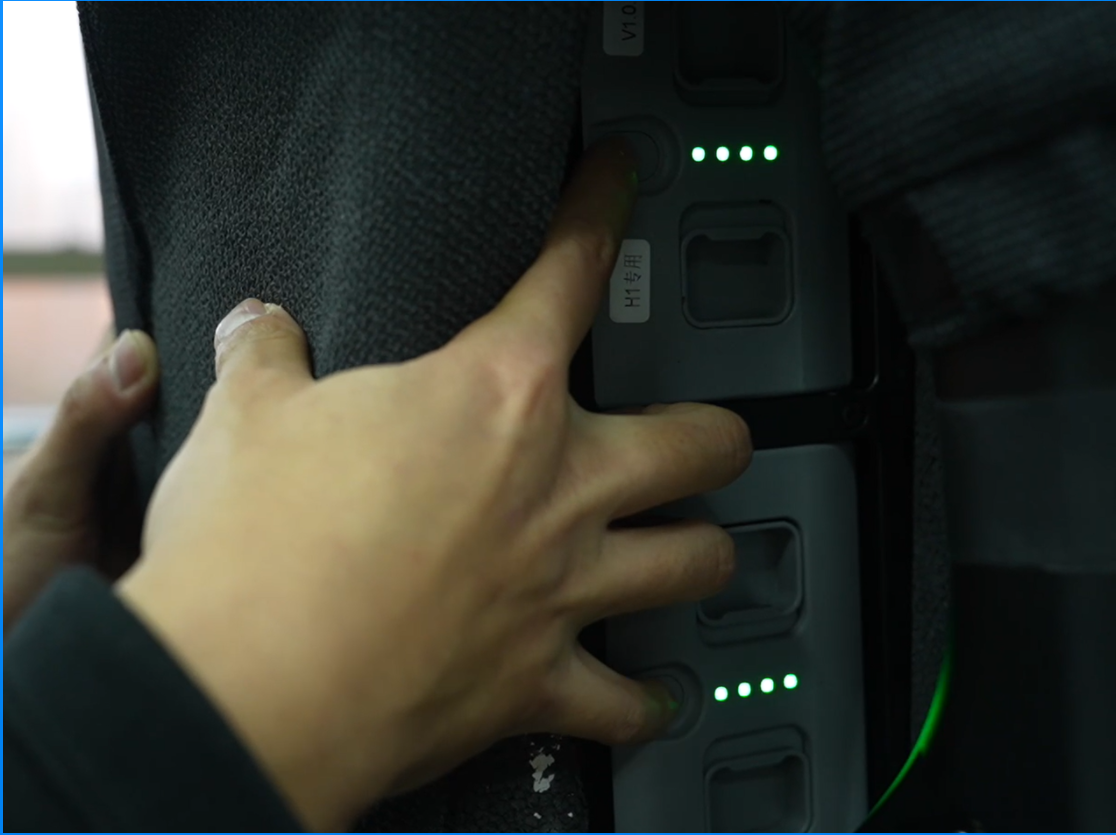
Fig. 49 Unitree H1 power on
Wait until you hear the
soundindicating that the ankle has reached its limit, and then wait an additional30 seconds.Press L1+A to unlock damping, then press R2+X to enter ready mode. At this point, the feet will spread out, and the arms will be at the sides of the waist. See Fig. 50.

Fig. 50 Unitree H1 ready
Lower the H1 with the protective frame until H1’s feet touch the ground and the fuselage remains stable.
Press (remote control) R2+X again to activate Sport Mode, and H1 will start marching in place.
Press START to switch to standing mode, then lower the hook and remove the rope.
Note
Under the current system version, once H1 is turned on, the built-in motion control program will automatically start, even if you do not operate the remote control. The program periodically sends instructions with a speed of 0 . However, if you use the SDK for underlying development in this state, it may cause instruction conflicts, causing H1 to jitter.
Note
If the behavior after pressing L2+A does not match the instructional video, press L2+R2 multiple times to ensure that it enters Develop mode.